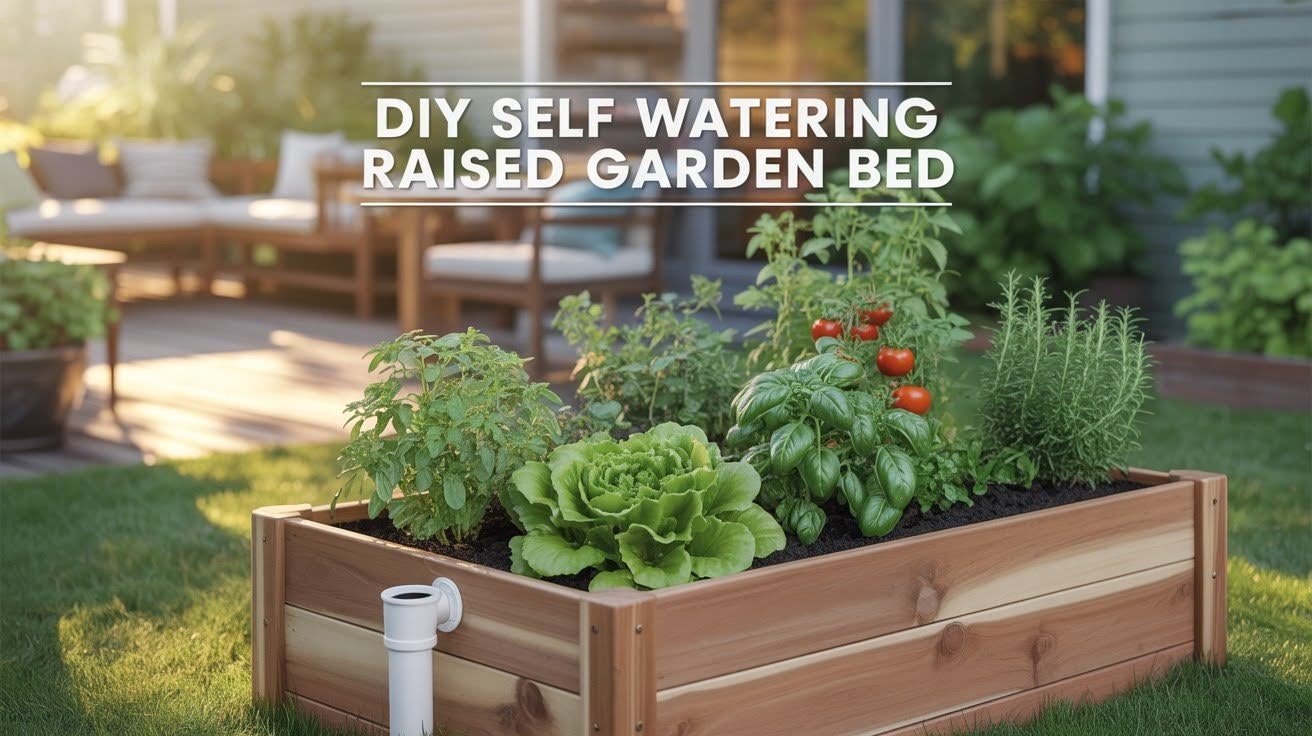
I built my first DIY self watering raised garden bed last summer. It solved my biggest gardening problem. I traveled for work and my plants always died from neglect.
This system changed everything. Your plants water themselves from a hidden reservoir below the soil. No daily watering needed.
This guide walks you through the complete build. I’ll show you the exact materials to buy, how to construct the frame, and how to set up the wicking system.
You’ll learn to create the reservoir, install drainage, and add the right soil mix.
I’ve built three of these beds now. I know what works and what doesn’t. You’ll avoid the mistakes I made. Let’s build yours today.
Understanding Self-Watering Raised Beds
Self watering systems work through simple science. They keep your plants happy without constant attention.
A self watering garden bed stores water in a reservoir below your soil. This design uses wicking action to pull moisture upward, just like a sponge soaking up liquid. Your plant roots draw water as needed. No pumps or electricity required.
These beds cut your watering time in half. Water sits in the reservoir for days or weeks, perfect for hot climates or busy schedules. You can leave for a weekend without worrying.
Overwatering becomes nearly impossible since excess water drains through overflow holes. Roots stay moist but never waterlogged, preventing root rot and fungal problems.
Materials and Tools You’ll Need
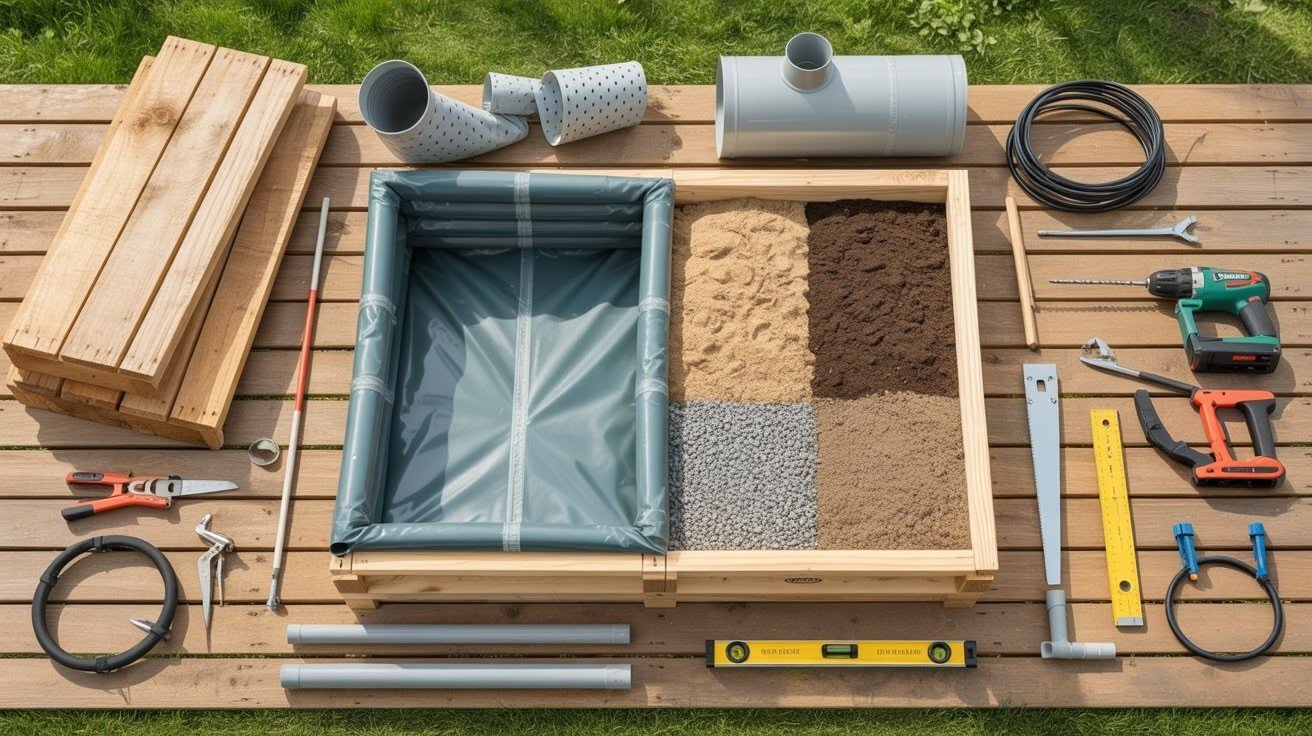
You’ll need wooden boards or pallets for the frame structure. Get a pond liner or heavy tarp to hold water. Pick up perforated drain pipes or PVC pipes for the reservoir. Grab gravel, crushed glass, or coarse sand for drainage.
Buy a lightweight potting mix or soil blend. Don’t forget a fill tube for adding water easily and overflow tubing to prevent flooding.
For tools, have a drill with various bit sizes ready. You’ll use a saw or jigsaw for cutting wood. Get clamps and outdoor screws to hold everything together.
Keep a utility knife or heavy scissors handy. A measuring tape and carpenter’s level ensure accuracy. A staple gun secures the liner in place.
Planning Your DIY Self-Watering Raised Bed
Good planning prevents problems later. Take time to measure and prepare.
Choose the Right Location:
Your bed needs 6 to 8 hours of direct sunlight daily. Most vegetables require full sun.
Pick level ground if possible. This helps water distribute evenly. Place your bed near a water source. You’ll refill the reservoir regularly during summer.
Decide on Size and Dimensions:
Common dimensions are 3 feet by 6 feet or 4 feet by 4 feet. These sizes let you reach the center without stepping inside.
Adjust based on your yard space. Consider what materials you have available. Taller beds (18 to 24 inches) hold more soil and water.
Prepare the Base:
Level your ground first. Use a rake to remove bumps and dips.
Add gravel or flat pavers underneath. This creates drainage stability. It also keeps wood from sitting in mud.
Step-by-Step: Building the Self-Watering Raised Garden Bed
Follow these steps carefully. Each one builds on the last.
Step 1: Build the Wooden Frame
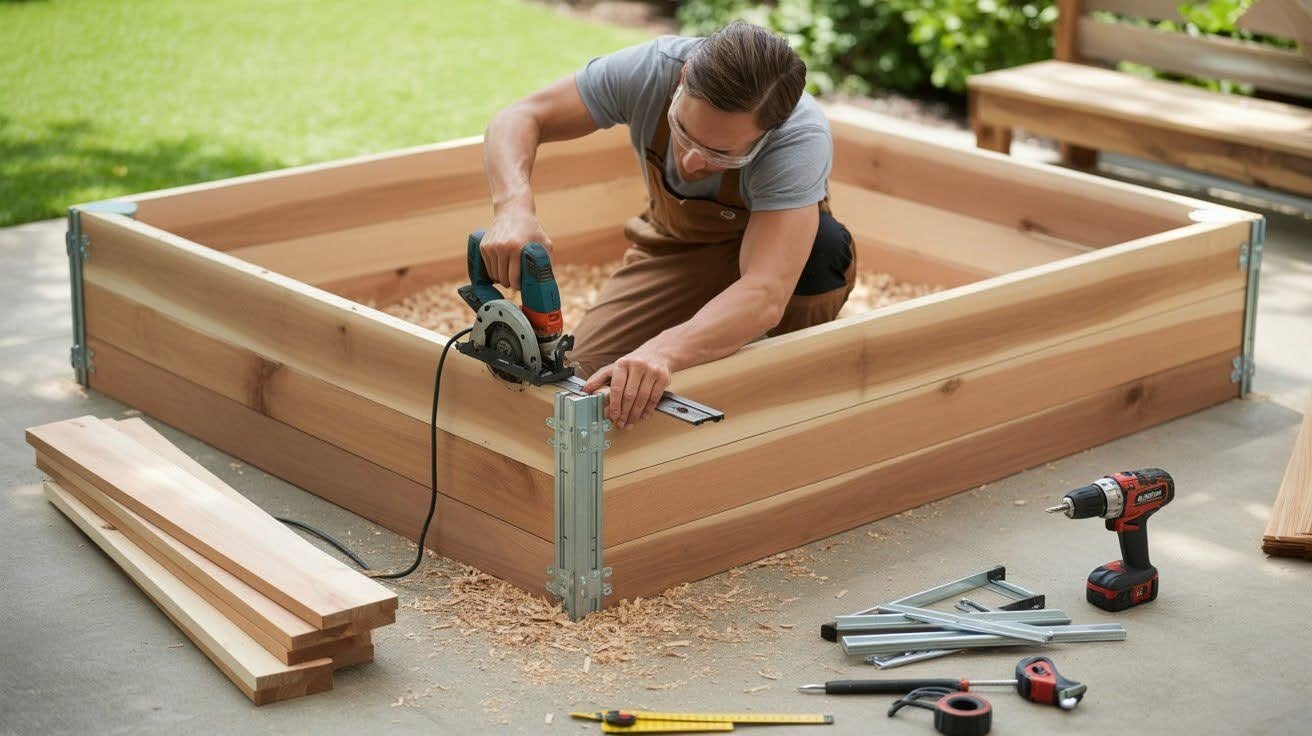
Cut your boards to size using a saw. Assemble corners using screws and metal corner cleats.
Check that your box sits square. Measure diagonally from corner to corner. Both measurements should match. Make sure the frame feels sturdy when you shake it.
Step 2: Install the Pond Liner or Tarp
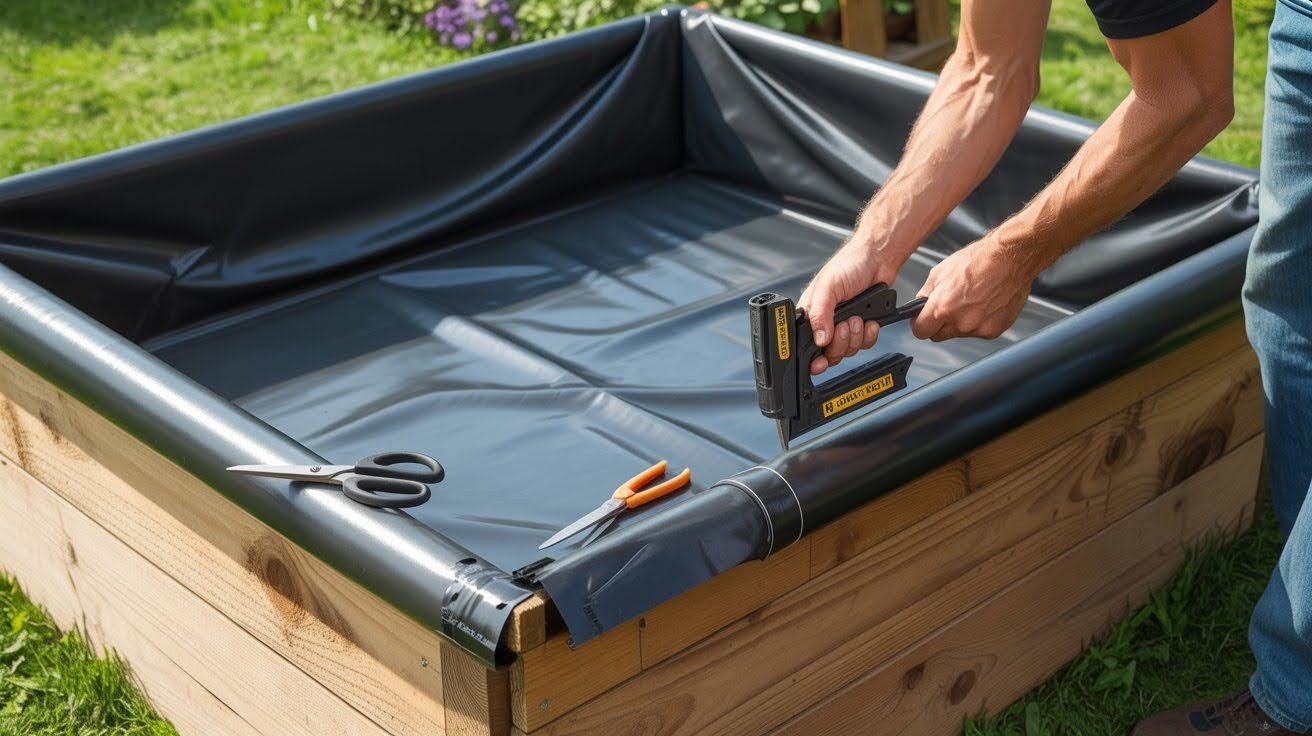
Line the inside walls and bottom completely. This creates your waterproof barrier.
Staple the liner to the top edge of the frame. Fold corners neatly to avoid bunching. Trim excess material with scissors or a utility knife.
Step 3: Create the Water Reservoir
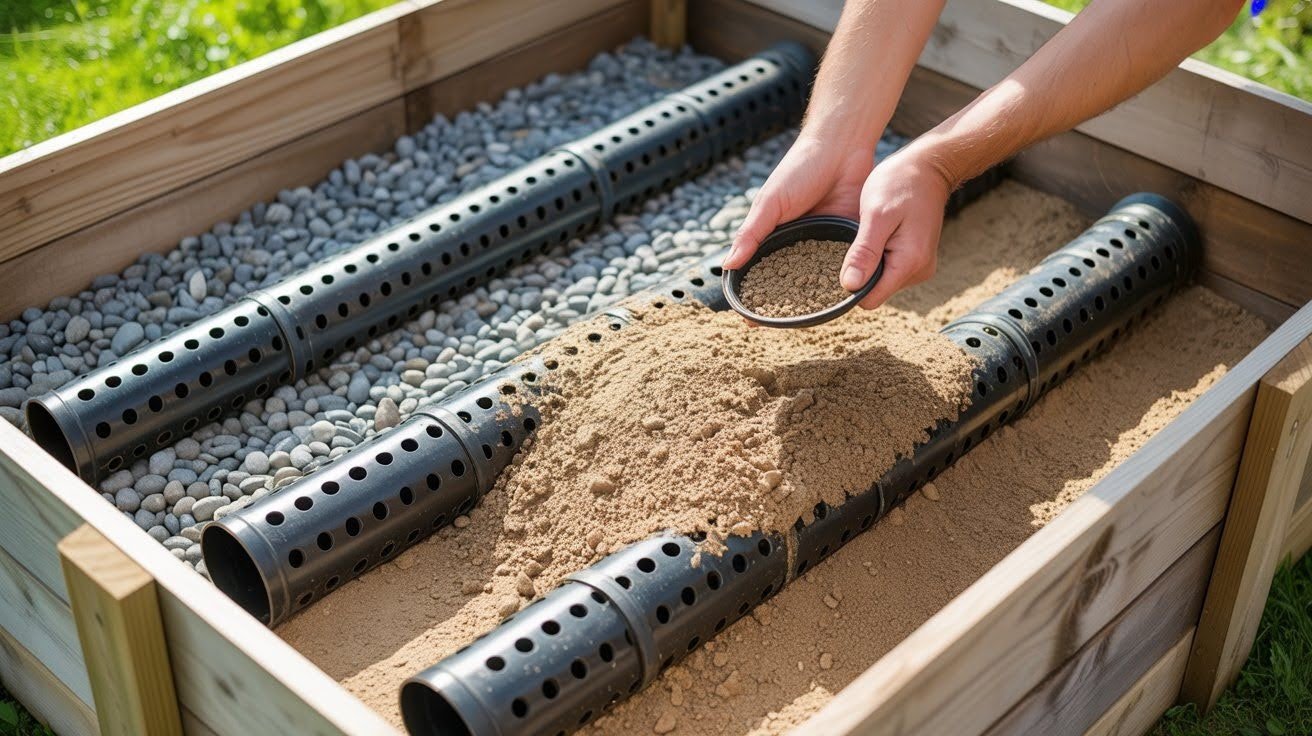
Lay perforated drain pipes across the bottom. Space them evenly about 12 inches apart.
Pack gravel or coarse sand around the pipes. Fill to about 4 to 6 inches deep. This layer stores water and supports the soil above.
Step 4: Add Fill and Drain Tubes
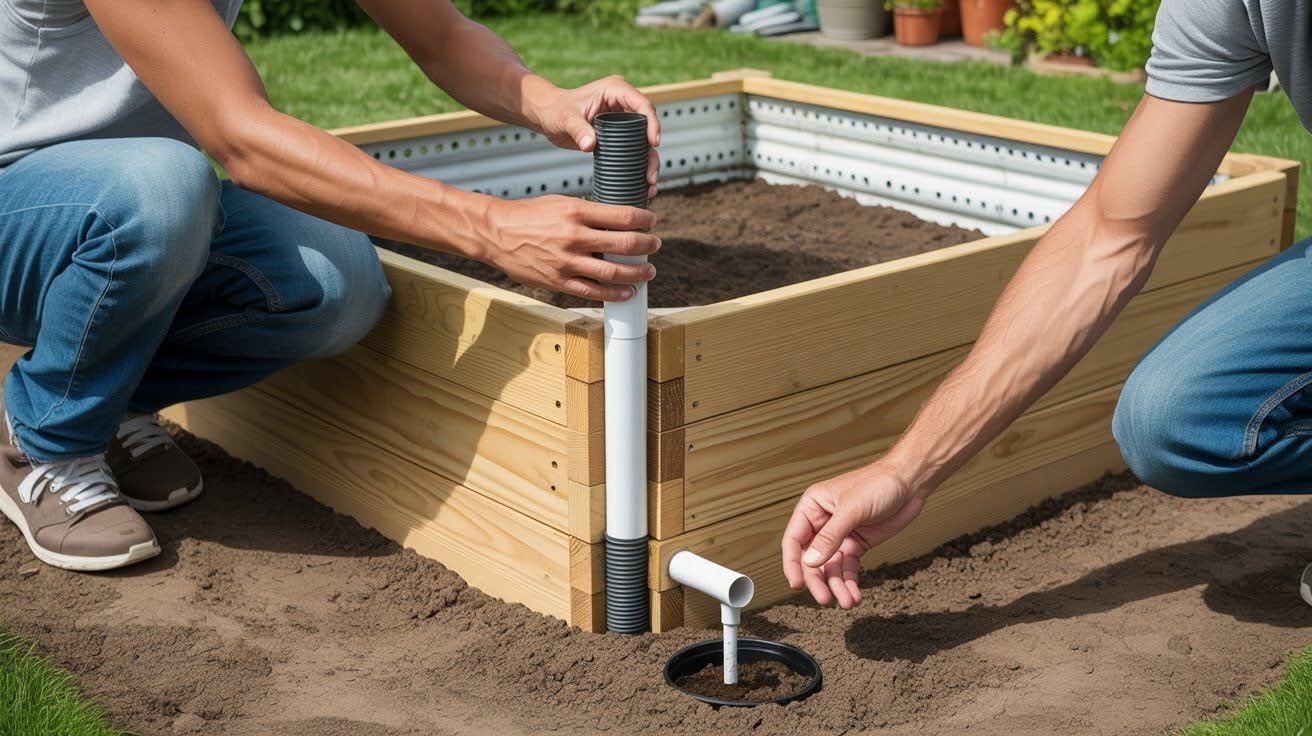
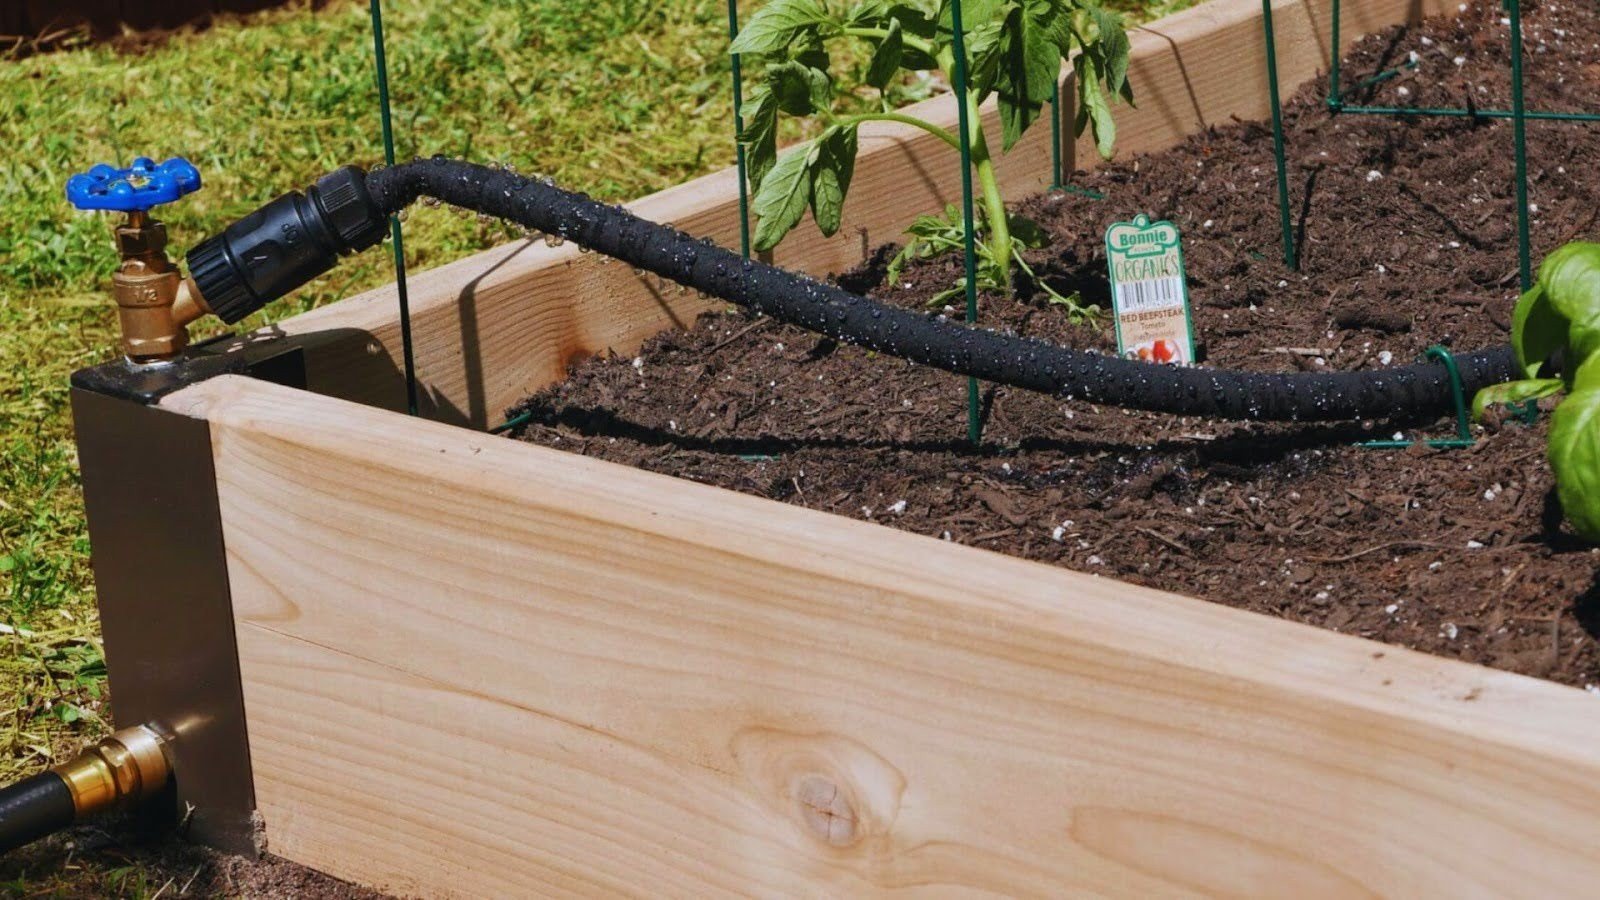
Insert a PVC fill tube vertically in one corner. This reaches from the reservoir to above soil level.
Drill an overflow hole in the liner about 2 inches below where soil will start. Attach short drainage tubing. This prevents the reservoir from overfilling.
Step 5: Add Wicking Layer and Soil Mix

Cover your gravel with landscape fabric or breathable cloth. This keeps soil from washing into the reservoir.
Add lightweight potting mix on top. Fill almost to the rim. Use soil designed for containers, not heavy garden dirt. Heavy soil blocks wicking action.
Step 6: Plant and Water
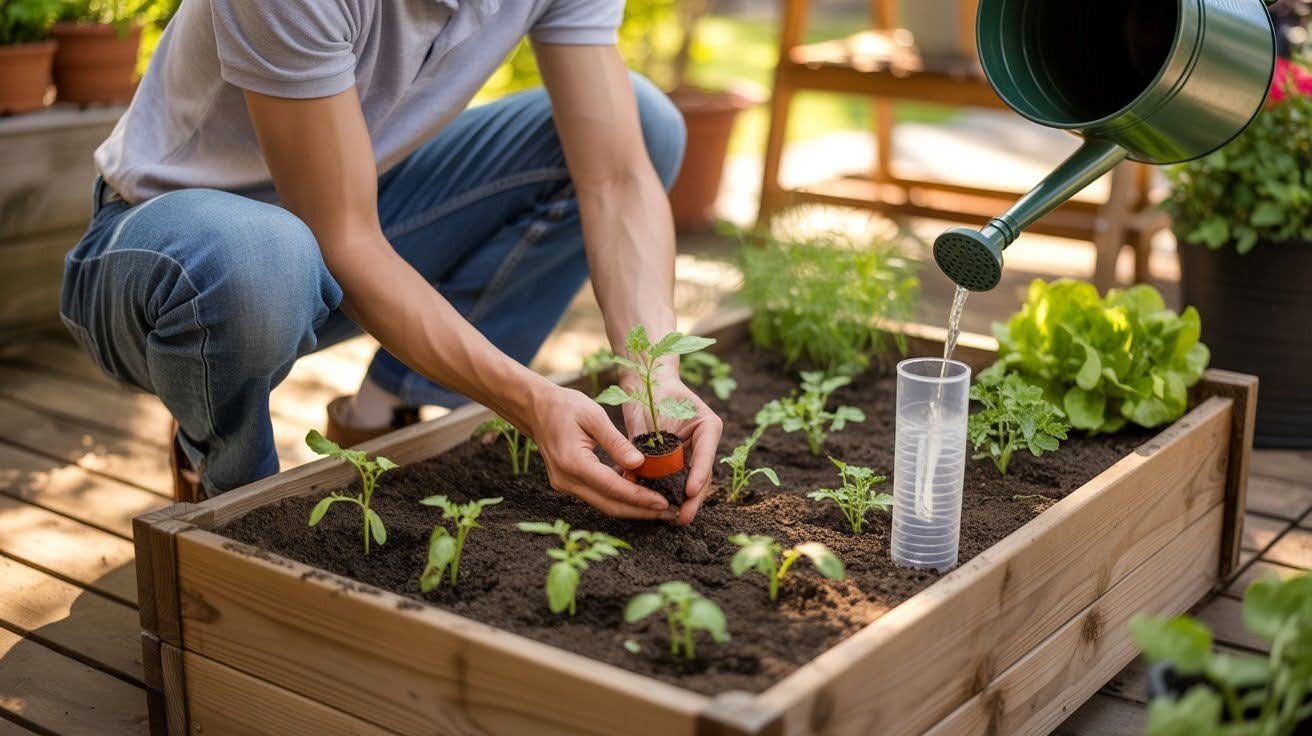
Add your seedlings or transplants like you normally would. Space according to plant requirements.
Fill the reservoir through the fill tube until water comes out the overflow. Water the soil surface once to help start wicking action. The system takes over from there.
Maintenance and Care Tips
Keep your bed healthy with simple routine checks.
- Check soil moisture every few days during hot weather by sticking your finger 2 to 3 inches down. Refill when the soil feels dry at that depth. In summer you might refill twice weekly while spring and fall need less frequent watering.
- Drain the reservoir before winter in cold climates since freezing water can damage your liner and pipes. Refill with fresh potting mix each year to replenish nutrients and help your plants grow stronger.
- Never use heavy garden soil because it compacts and stops wicking action. Don’t forget the overflow hole or your plants will drown.
- Always mulch the top layer to reduce evaporation and keep roots cool.
Conclusion
I built my first DIY self watering raised garden bed three years ago, and honestly, it was a game changer. No more rushing home to water or feeling guilty about weekend getaways.
Your plants will stay healthy with way less effort. The system practically takes care of itself once you get it running. Start with just one bed and watch what happens. You can always add more next season.
Try it out and let me know how it goes. Drop a comment below with your results or questions. Happy gardening!
Frequently Asked Questions
How long does the water reservoir last before refilling?
The reservoir lasts 5 to 10 days depending on weather. Hot summer days may need refilling twice weekly.
Can I use regular garden soil in a self watering bed?
No, regular garden soil is too heavy. Use a lightweight potting mix designed for containers instead.
What vegetables grow best in self watering raised beds?
Tomatoes, peppers, lettuce, and herbs work great. Avoid dry-loving crops like lavender or rosemary.
Do I ever need to water from the top ever?
Water from the top once after planting. After that, fill only through the reservoir tube.
How do I prevent mosquitoes in the water reservoir?
The reservoir stays sealed under soil and fabric. Mosquitoes can’t access it if your overflow drains properly.