I know the stress of craft supplies taking over your home. I’ve been there too. Over the years, I’ve helped countless crafters organize their spaces without spending a fortune.
In this guide, I’ll share practical DIY small craft room ideas that actually work in real homes. You’ll learn vertical storage tricks, smart furniture picks, and category-based organizing systems.
I’ll show you flex spaces, creative storage hacks, and ways to use every inch wisely. These aren’t fancy dreams. They’re tested solutions from my own crafting space.
Let’s turn your cramped corner into an organized haven that boosts your creativity.
Create a Dedicated Space
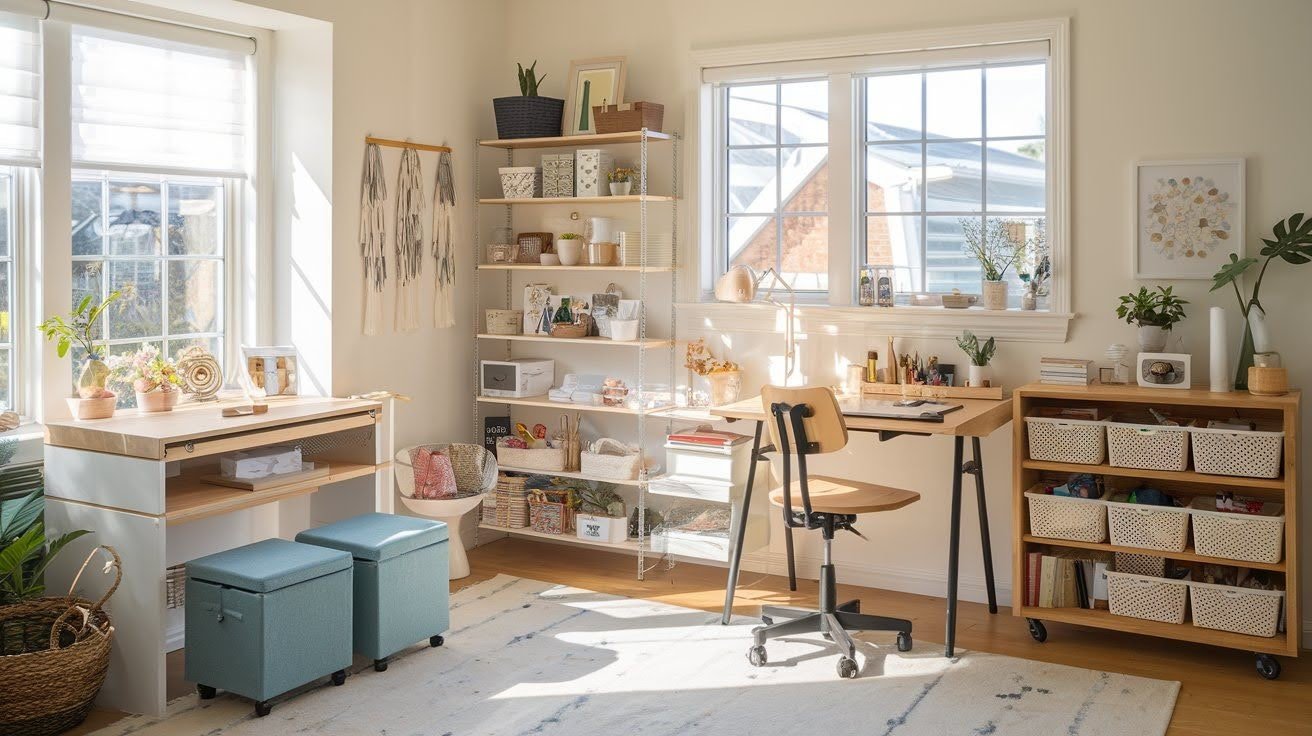
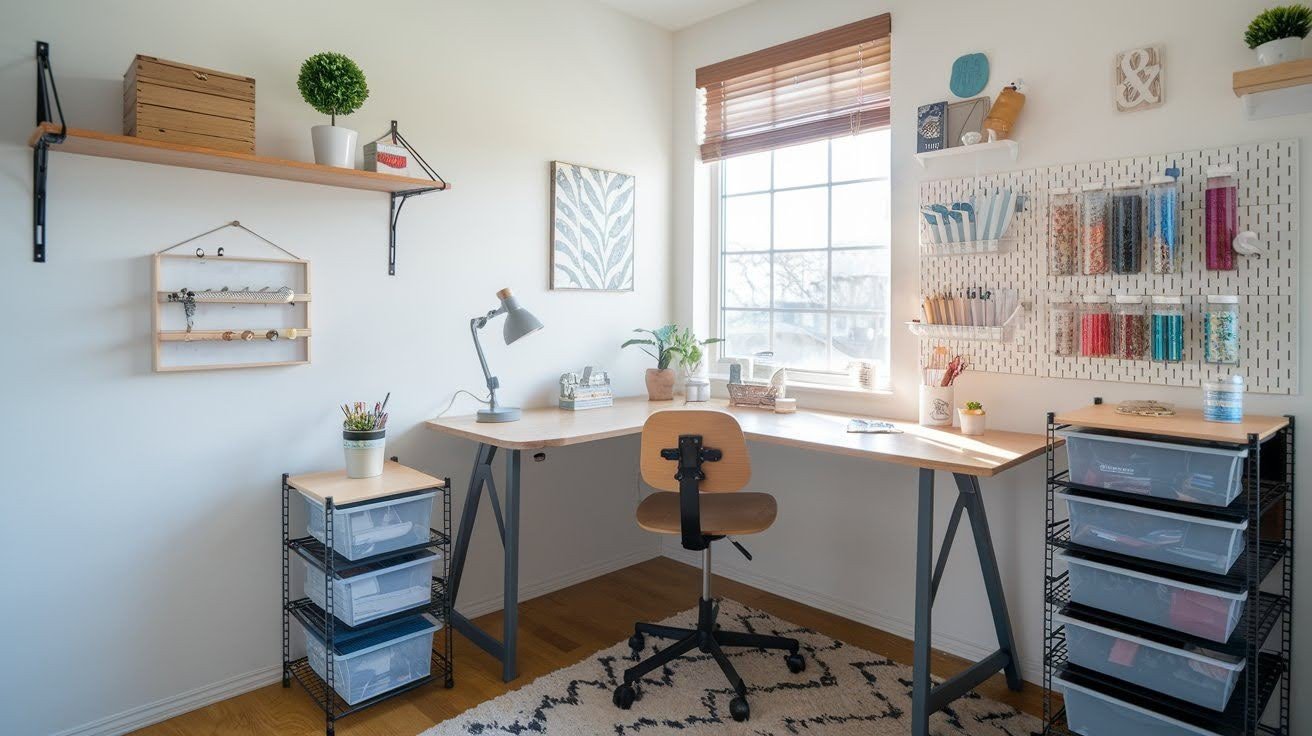
Look around your home with fresh eyes. That spare bedroom corner? Perfect. The underused dining room space? Even better. Home offices can double as craft zones during off hours. Natural light makes a huge difference.
Position your workspace near windows whenever possible. You’ll strain your eyes less and see colors more accurately.
Multi-purpose furniture saves the day in small homes. Storage ottomans hide supplies while providing extra seating. Murphy desks fold up when not in use. Folding tables are game changers.
Set them up for big projects and tuck them away afterward. Mobile workstations on wheels let you craft anywhere. Roll them to the living room for movie night crafting or outside on sunny days.
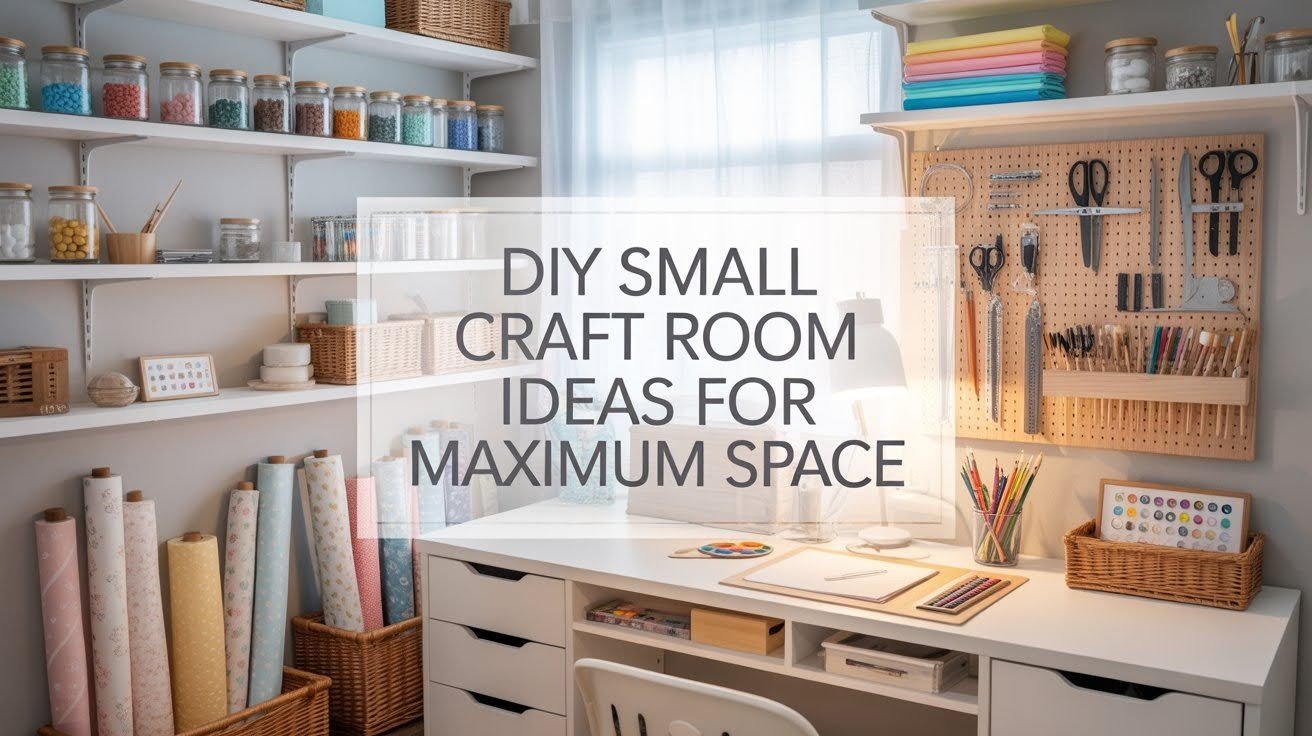
DIY Small Craft Room Ideas for Maximum Space
Smart storage solutions that turn cramped spaces into organized creative havens.
Maximize Vertical and Wall Storage
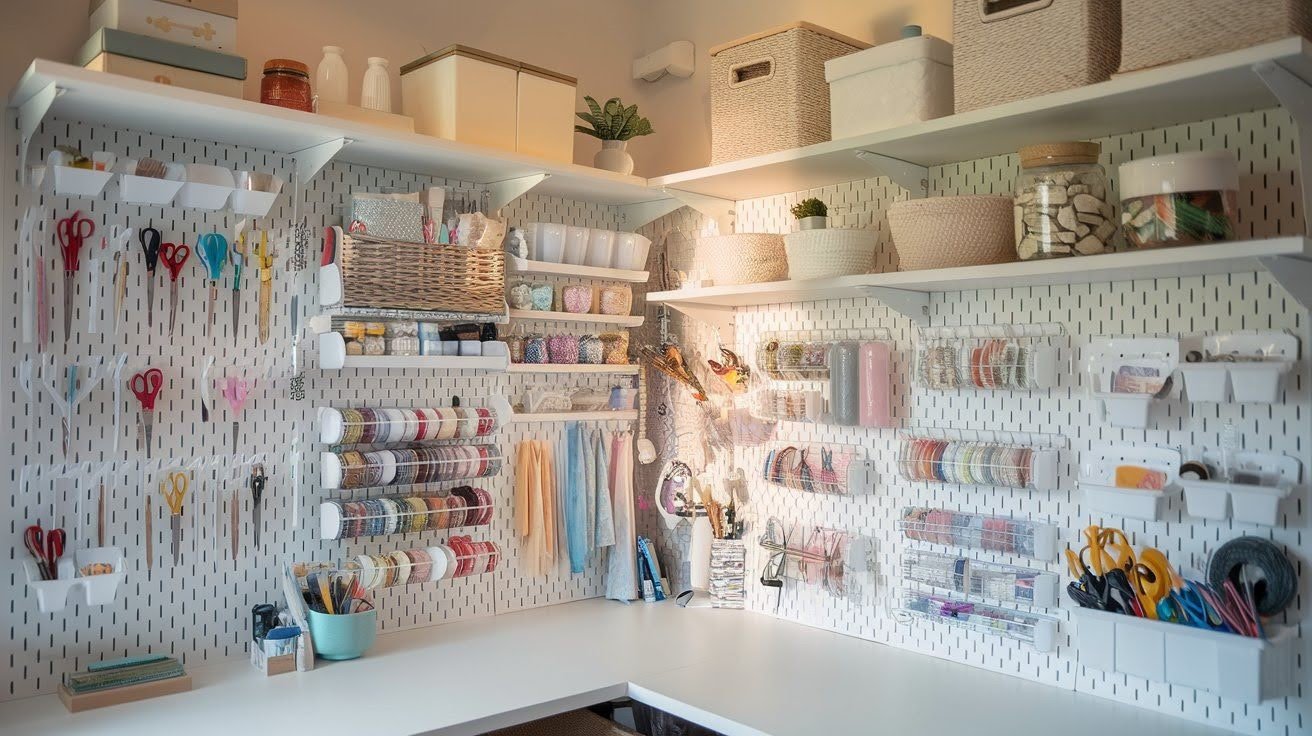
Walls are your secret weapon for storage.
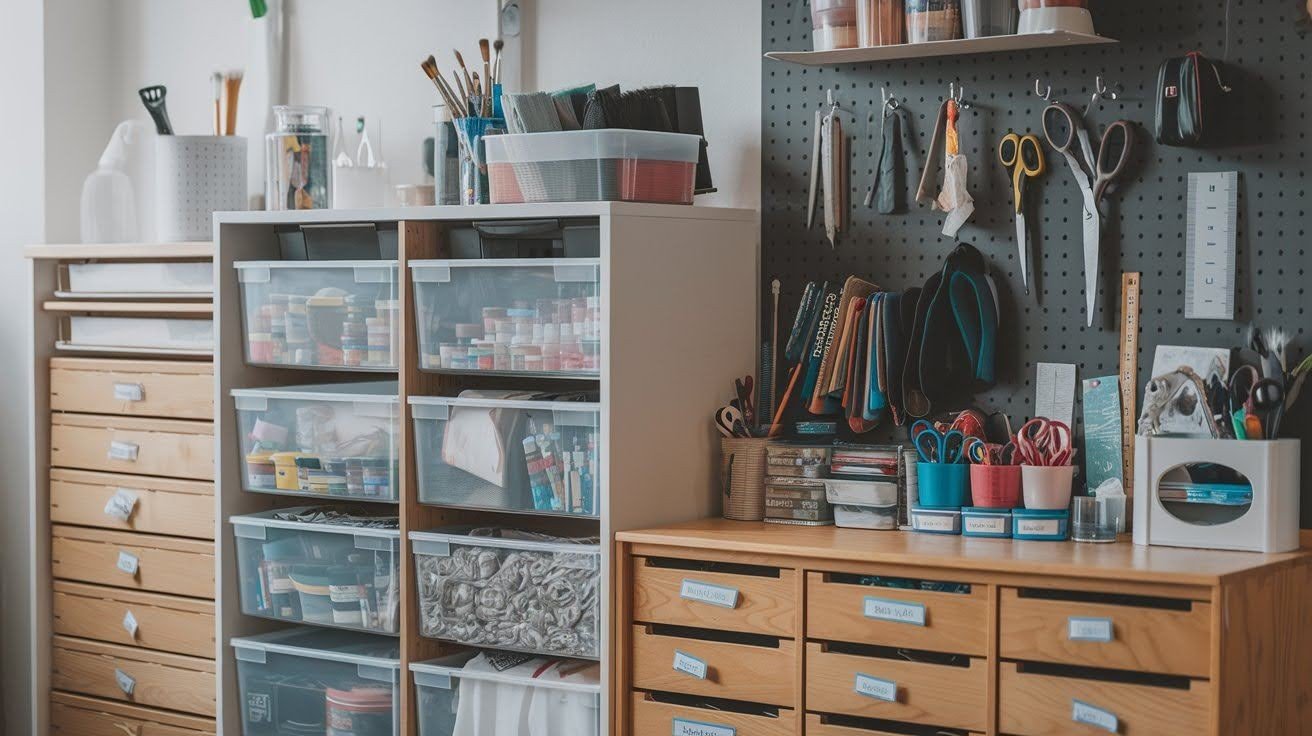
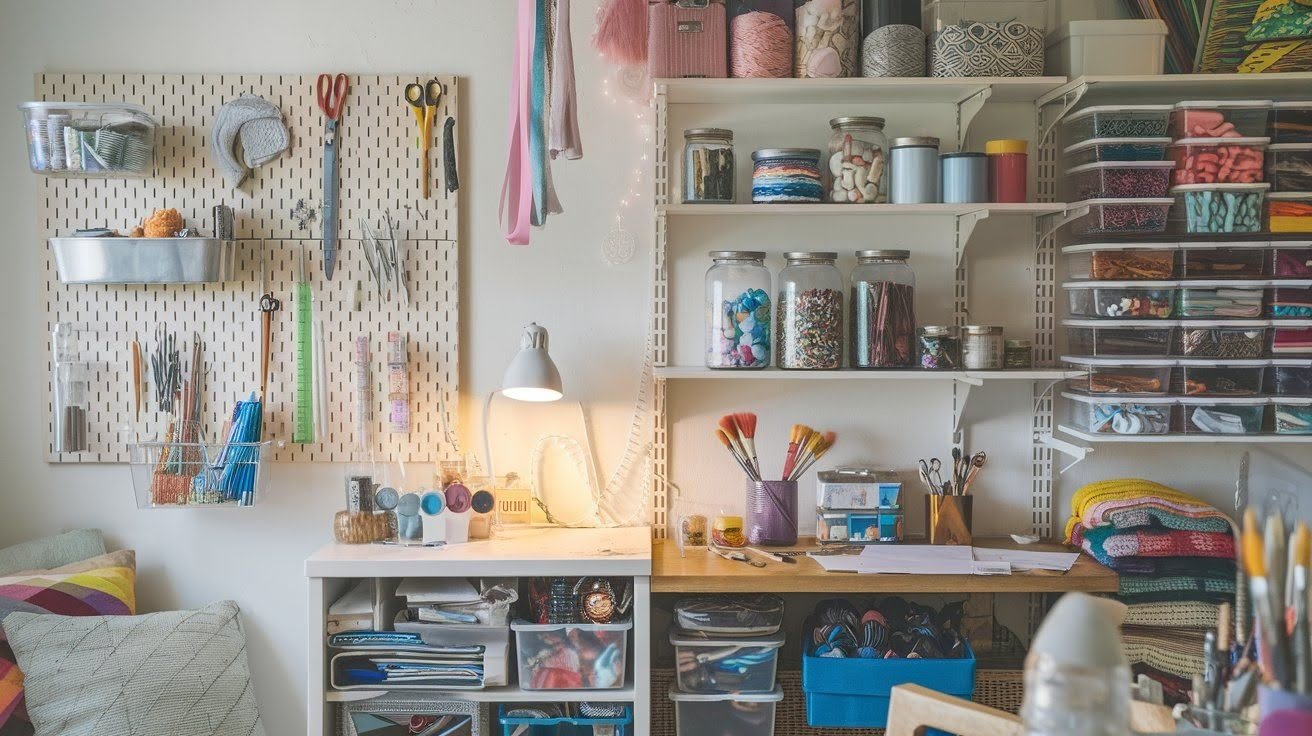
- Pegboards for Tools and Supplies: Pegboards keep everything visible and within reach. Hang your scissors, tape dispensers, and measuring tools right where you can grab them. No more digging through drawers.
Paint your pegboard to match your room. Add decorative hooks in fun shapes. Rearrange the layout whenever your needs change.
- Floating Shelves: These shelves create storage without eating up floor space. Stack craft books, display finished projects, and organize supplies in pretty containers.
Install them at different heights for visual interest. Keep your most-used items at eye level.
- Wall-Mounted Racks and Hooks: Yarn storage becomes easy with wall-mounted racks. Ribbons stay tangle-free on hooks.
Small tools hang neatly instead of cluttering drawers. Mount racks near your workspace. Everything stays accessible while you work.
Smart Furniture Choices
The right furniture does double duty in small spaces.
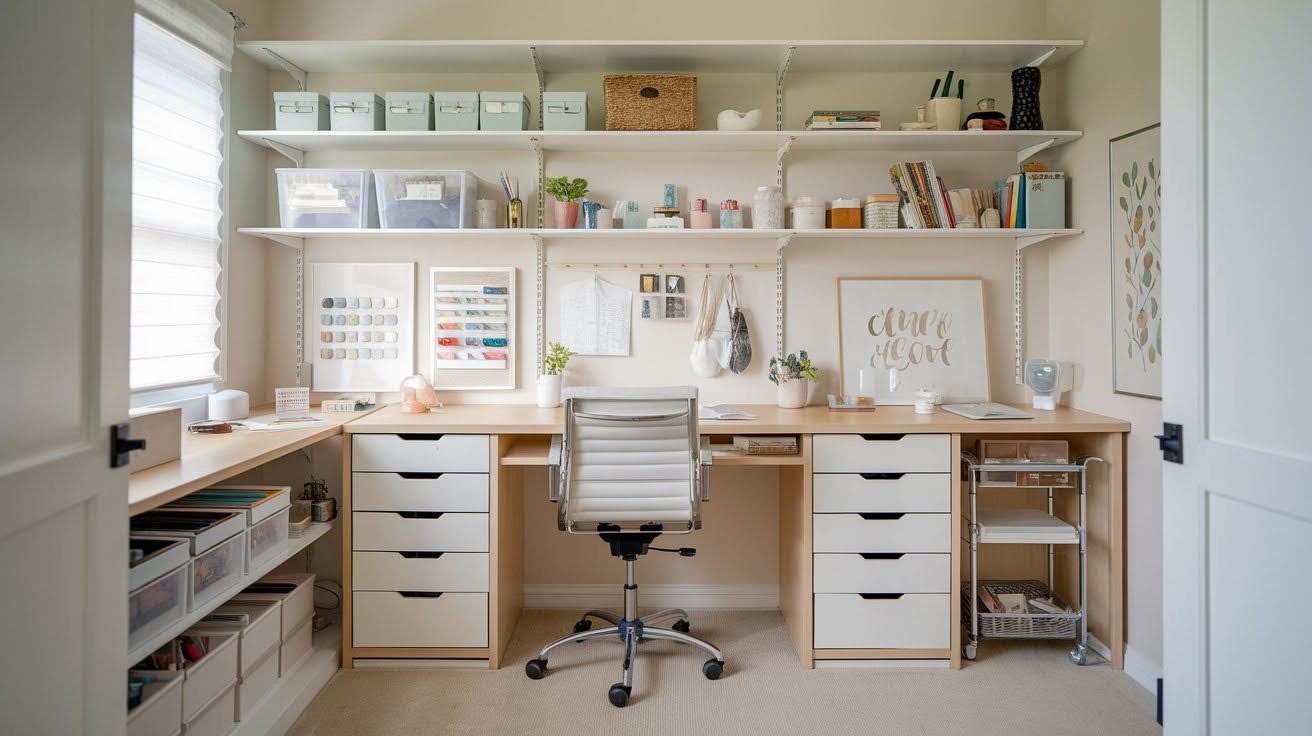
- Desks and Tables with Storage: Adjustable height tables prevent back pain during long crafting sessions. Raise them for standing projects. Lower them for detailed work.
Look for desks with built-in drawers. Add baskets underneath for extra storage. Every inch counts in small rooms.
- Mobile Workstations: Rolling tables give you flexibility. Move them around as your projects change. Store them in closets when guests visit.
Choose carts with locking wheels. They stay put when you need stability but roll easily when you want to move them.
- Chairs for Comfort and Support: Swivel chairs let you reach supplies without standing up constantly. Stools with lumbar support save your back during marathon crafting sessions.
Adjustable seating adapts to different project types. Lower chairs work for sewing. Higher stools suit standing desks.
Use Creative Storage Solutions
Think beyond traditional organizers.
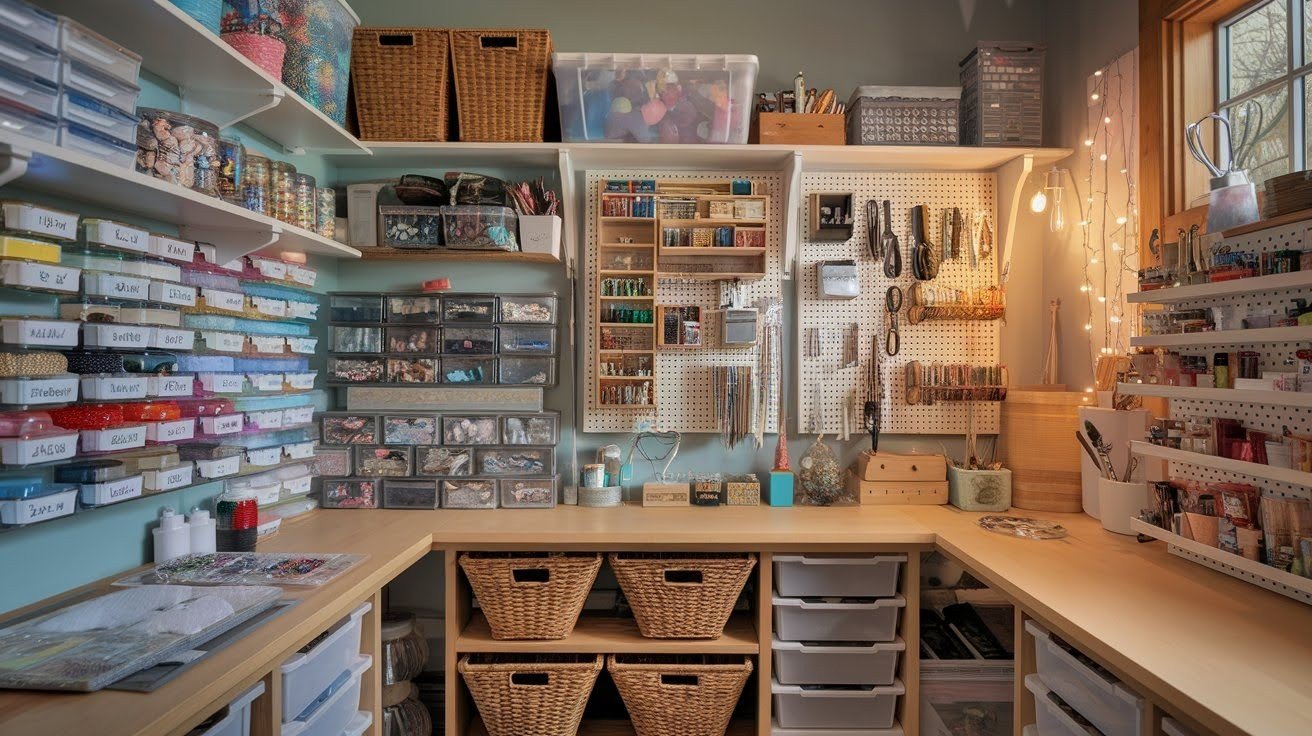
- Drawers and Stackable Units: Plastic drawer units cost less and stack easily. Wooden drawers look nicer and last longer. Hardware drawers with tiny compartments perfect for beads and buttons.
Sort supplies by type. Keep all your paints together. Group papers by color or size. Label everything clearly.
- Boxes, Crates, and Vintage Containers: Jewelry boxes organize small findings beautifully. Cigar boxes hold embroidery floss. Wine crates stack into rustic shelving units.
Hit up thrift stores for unique containers. Upcycling saves money and adds character to your space.
- Jars, Tins, and Cans: Clear glass jars let you spot supplies instantly. Mason jars work for everything from buttons to paintbrushes. Cookie tins add vintage charm while storing ribbons and threads.
Apothecary jars display pretty supplies like colored beads. Small containers corral tiny items that otherwise disappear.
- Packaging and Recycled Materials: Amazon boxes become drawer dividers when cut to size. Laptop boxes store paper perfectly. Plastic food containers hold glitter without spills.
This approach costs nothing and helps the environment. Just clean containers thoroughly before using them.
Organize by Category and Frequency of Use
Smart organization systems save time and reduce stress.
- Sorting Supplies by Type or Color: Group similar items together. Keep all adhesives in one spot. Store cutting tools in another area. Color-coding makes supplies easy to find.
Label every container clearly. Your future self will thank you. Use a label maker or simple masking tape and markers.
- Seasonal and Project-Based Storage: Some supplies only come out occasionally. Holiday crafts can live in storage bins most of the year.
Rotate items based on current projects. Keep active project supplies front and center. Move finished project materials to deeper storage.
Maximize Small Corners and Hidden Spaces
Every nook and cranny can work for you.
- Corner Desks and Nooks: Corners often sit empty and wasted. Corner desks fit snugly into these spaces. Add a small lamp for proper lighting.
Tight corners become cozy crafting spots with the right setup. Measure carefully before buying furniture.
- Under-Table and Shelf Storage: The space under tables and shelves holds tons of supplies. Pull-out bins slide in and out easily.
Baskets add texture while hiding clutter. Rolling carts tuck under tables when not needed. Keep floors clear for comfortable movement around your space.
DIY Craft Room Hacks
Clever hacks turn ordinary items into organizing heroes.
- Mini File Folders and Accordion Files: Paper scraps disappear into chaos without proper storage. Mini file folders organize them by color or type.
Accordion files expand to hold surprising amounts. Find free printable templates online. Create custom dividers for your specific needs.
- Wall Frames and Window Storage: Old picture frames get new life as ribbon holders. Stretch lace across frames for display and storage combined.
Vintage windows become unique organizers with added hooks. These solutions look decorative while serving practical purposes. Guests will admire them as art pieces.
- Creative Labeling and Visual Organization: Color-coded systems work for visual learners. Assign each craft type a specific color. Clear containers let you see contents at a glance.
Labels maintain order over time. Take photos of organized spaces. They help you return items to proper spots after big projects.
Tips for Maintaining an Organized Small Craft Room
Simple weekly habits keep your craft space tidy and functional without major time investment.
- Schedule ten minutes each week for quick tidying. Put supplies back where they belong. This small habit prevents big messes from forming.
- Place your most-used supplies closest to your workspace. Scissors, glue, and tape should sit within easy reach. Store rarely used items in higher spots.
- Switch out materials as seasons change. Pack away holiday supplies after use. Bring out current project materials. This rotation prevents overcrowding.
- Label new containers right away. Update labels when contents change. Clear marking helps everyone know where things go.
- Stop buying supplies just because they’re on sale. Go through your stash twice a year. Donate unused materials. A smaller collection beats cluttered overflow.
Conclusion
You now have plenty of DIY small craft room ideas to work with. Start with one corner this weekend. I organized my tiny closet craft space using these methods, and honestly, crafting feels fun again instead of overwhelming.
Your space doesn’t need expensive makeovers. Just smart planning and a bit of creativity. Pick one tip from this list and try it today. Which idea speaks to you?
Drop a comment below and tell me how it goes. I’d love to hear about your craft room wins.
Frequently Asked Questions
How can I organize a craft room with no space?
Use vertical storage like pegboards and floating shelves. Multi-purpose furniture with built-in storage helps maximize every inch available.
What is the best way to store craft supplies in small spaces?
Sort supplies by category in clear containers. Wall-mounted storage and stackable units keep everything organized and easy to find.
How do I create a craft area in a small apartment?
Dedicate a corner with folding furniture. Rolling carts store supplies and move between rooms as needed.
What furniture works best for small craft rooms?
Adjustable desks with drawers and mobile workstations offer flexibility. Comfortable chairs with support prevent fatigue during long projects.
How can I make my small craft room look bigger?
Keep floors clear with vertical storage. Use light colors and position workspace near windows for natural light.